Arduino with istSOS
Here you can find a quick guide on how to connect an Arduino UNO or NANO with a sensor and send the data to an istSOS server.
Connecting Arduino UNO with DHT11 sensor and upload data to istSOS
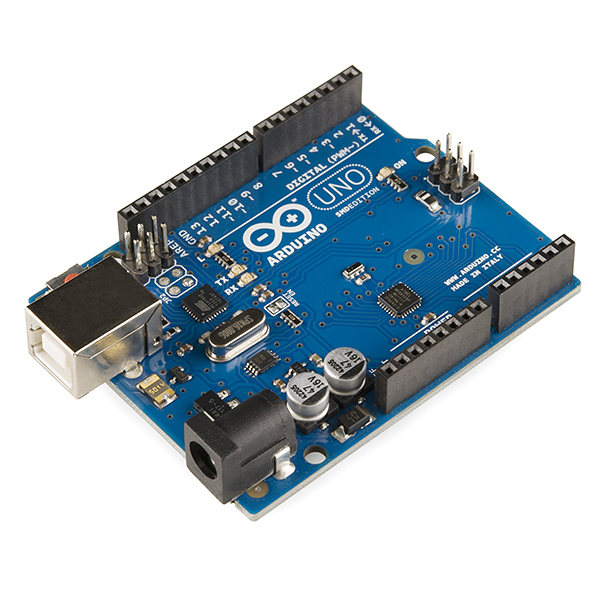
Arduino UNO Rev. 3
Arduino is an open-source prototyping platform based on easy-to-use hardware and software. Arduino boards are able to read inputs - light on a sensor, a finger on a button, or a Twitter message - and turn it into an output - activating a motor, turning on an LED, publishing something online. All this is defined by a set of instructions programmed through the Arduino Software (IDE).
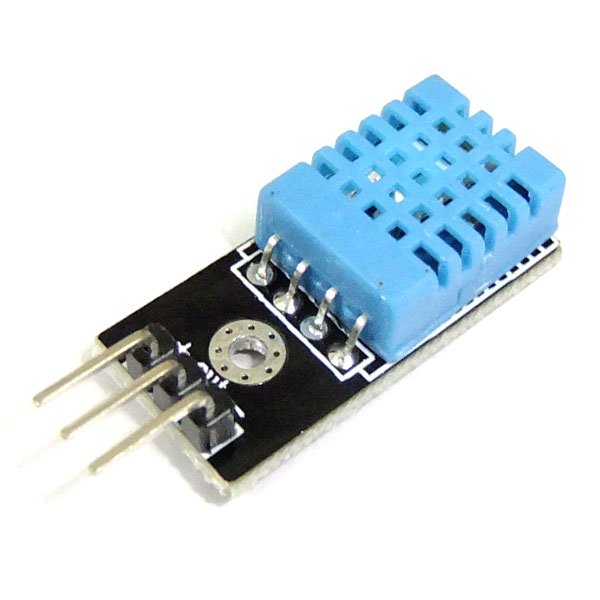
DHT11 sensor
The DHT11 is a basic, ultra low-cost digital temperature and humidity sensor. It uses a capacitive humidity sensor and a thermistor to measure the surrounding air, and spits out a digital signal on the data pin (no analog input pins needed). It’s fairly simple to use, but requires careful timing to grab data. The only real downside of this sensor is you can only get new data from it once every 2 seconds, so when using our library, sensor readings can be up to 2 seconds old.
Details:
- Good for 20-80 % humidity reading with 5% accuracy
- Good for 0-50 °C temperature reading +/- 2°C accuracy
- Low cost
Mounting instruction
Connect the DHT11 sensor to Arduino board
| DHT11 pin | Arduino Pin |
| + | 5V |
| out | A0 |
| - | GND |
Schema

Setup
Arduino can be connected to your PC through the USB port. The mainboard use the serial port to communicate.
Set your Arduino Software environment
Arduino boards are able to read inputs and turn it into an output. All this is defined by a set of instructions programmed through the Arduino Software (IDE) and uploaded to the microcontroller.
- Install the DHT sensor library using the “Library Manager” (Sketch > Include Library.. > Manage Library)
Upload to Arduino the script to read data
- Open your Arduino IDE program and paste this code:
DHT dht(DHTPIN, DHTTYPE);

void setup() {
    Serial.begin(9600);
    dht.begin();
}

void loop() {
    // Wait a few seconds between measurements.
    delay(1000);

    // Reading temperature or humidity
    float h = dht.readHumidity();
    // Read temperature as Celsius (the default)
    float t = dht.readTemperature();
    // Read temperature as Fahrenheit (isFahrenheit = true)
    float f = dht.readTemperature(true);

    // Check if any reads failed and exit early (to try again).
    if (isnan(h) || isnan(t)) {
        Serial.println("Failed to read from DHT sensor!");
        return;
    }

    // Compute heat index in Celsius (isFahreheit = false)
    float hic = dht.computeHeatIndex(t, h, false);

    Serial.print(h);
    Serial.print(',');
    Serial.print(t);
    Serial.print(',');
    Serial.println(hic);
}
Note
Before uploading the program to the board verify the code to avoid error like missing library. Then if no error upload the code to the Arduino board.
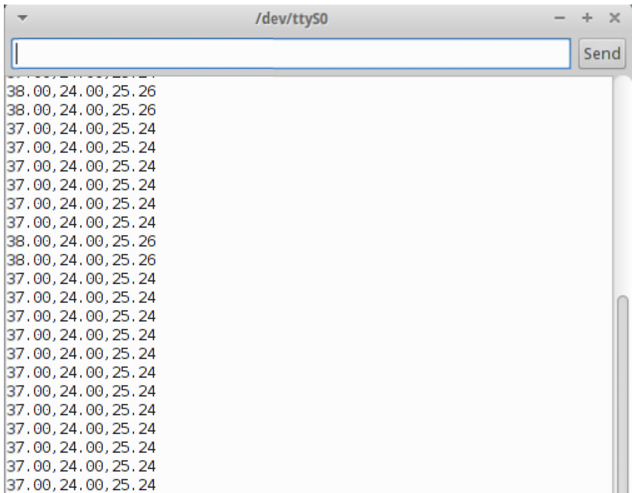
Visualize your measurements
To check if the the program is correctly running use the serial monitor.
Data acquisition
First let’s create a new Arduino sensor in istSOS, add procedure arduino with multiple observed properties:
| Name: | arduinouno |
| Description: | Arduino board used in the tutorial |
| Keywords: | arduino,air,temperature,humidity |
| System type: | insitu-fixed-point |
| Sensor type: | DHT11 |
| FOI name: | GENOVA |
| EPSG: | 4326 |
| Coordinates: | x: 44.4029 y: 8.9587 z: 63 |
Add relative humidity:
| Observed property | urn:ogc:def:parameter:x-istsos:1.0:meteo:air:humidity:relative |
| Unit of measure: | % |
Add air temperature:
| Observed property: | urn:ogc:def:parameter:x-istsos:1.0:meteo:air:temperature |
| Unit of measure: | °C |
Add heat index:
| Observed property: | urn:ogc:def:parameter:x-istsos:1.0:meteo:heat:index |
| Unit of measure: | °C |
Register the new sensor (procedure) pressing the “submit” button.
Now it’s time to read the data coming from arduino and upload them to istSOS. In the script folder of istsos you can find the serial2istsos.py file.
Note
This script is an example of how to read data from the serial output and send data in real time to istSOS using the WA-REST API.
python script/serial2istsos.py --help

usage: serial2istsos.py [-h] [-v] [-c C] [-x X] [-b B] [-p P] [-u url]
                [-s service] [-user user name] [-password password]

Load data read from a serial port and execute insert data to istSOS

optional arguments:
  -h, --help          show this help message and exit
  -v                  Activate verbose debug
  -c C                Config file instead of inline params
  -x X                Serial port to listen
  -b B                serial port baudrate
  -p P                Procedure name
  -u url              istSOS Server address IP (or domain name) used for all
                      request. (default: http://localhost:80/istsos).
  -s service          The name of the service instance.
  -user user name
  -password password
The configuration file:
{
    "url": "http://istsos.org/istsos",
    "service": "demo",
    "port": "/dev/ttyACM0",
    "baud": "9600",
    "procedure": "arduino",
    "aggregationInterval": "PT10S",
    "observations": [{
        "name": "urn:ogc:def:parameter:x-istsos:1.0:meteo:air:humidity:relative",
        "column": 13,
        "nodata": -1,
        "aggregation": "avg"
    },{
        "name": "urn:ogc:def:parameter:x-istsos:1.0:meteo:air:temperature",
        "column": 14,
        "aggregation": "avg"
    },{
        "name": "urn:ogc:def:parameter:x-istsos:1.0:meteo:air:heatindex",
        "column": 2,
        "aggregation": "avg"
    }]
}
Date time configuration variations are optional, if not given, current timestamp will be used, other configurations
Execute the script, but close the Arduino IDE “Serial Monitor” if still opened.
cd /usr/share/istsos
python scripts/serial2istsos.py -v -c /home/user/Desktop/Tutorial/arduino/arduino-uno.json
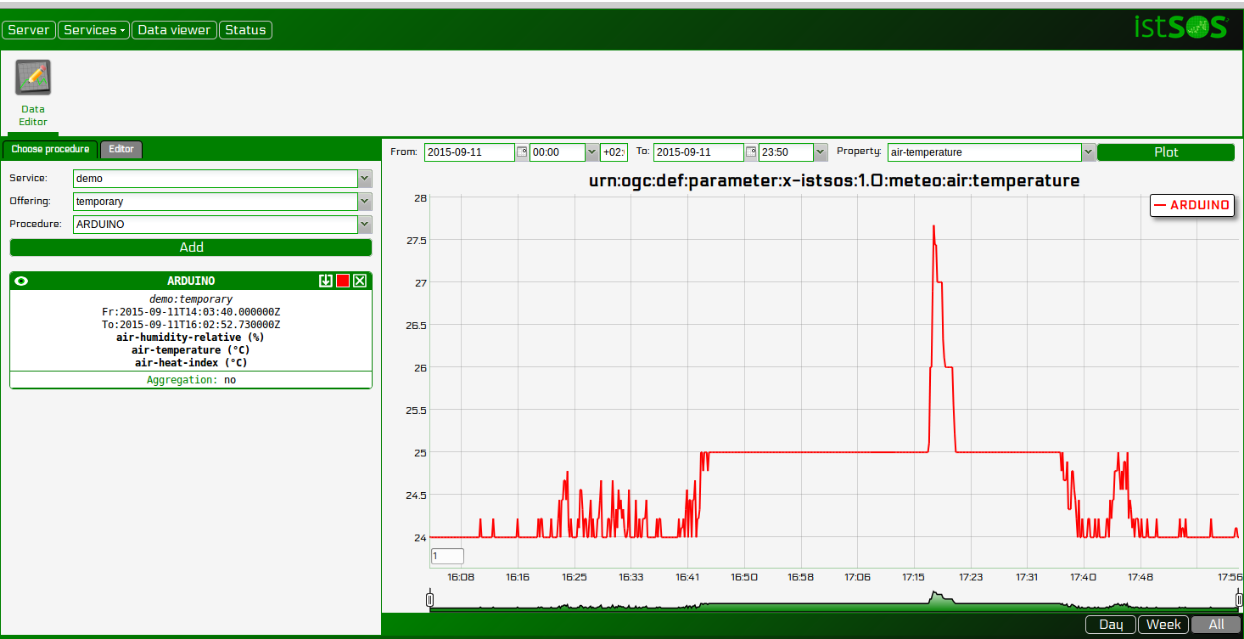
You can check your data in the “Data Viewer”
Connecting Arduino NANO with a DS18B20 Temperature and upload data to istSOS
Arduino NANO
The Arduino Nano is a small, complete, and breadboard-friendly board based on the ATmega328 (Arduino Nano 3.x). It has more or less the same functionality of the Arduino Duemilanove, but in a different package. It lacks only a DC power jack, and works with a Mini-B USB cable instead of a standard one.

DS18B20 Temperature probe
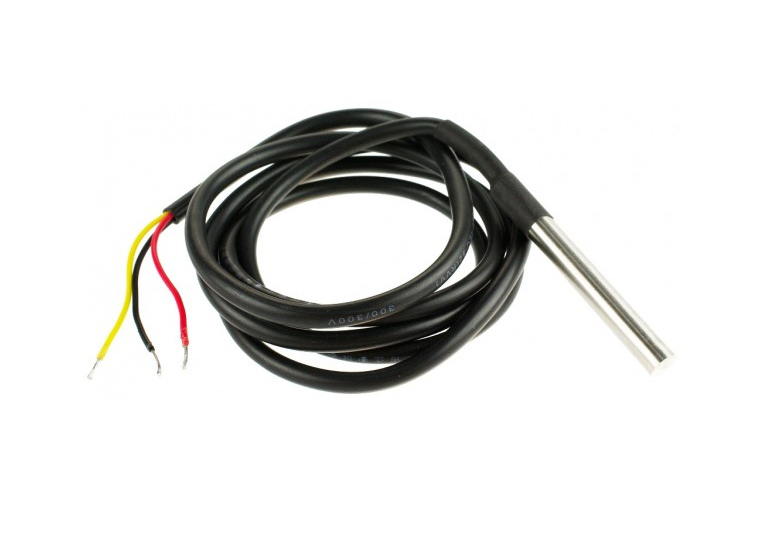
Details:
- 0.5°C accuracy
- Waterproof
- Very cheap
Mounting instruction
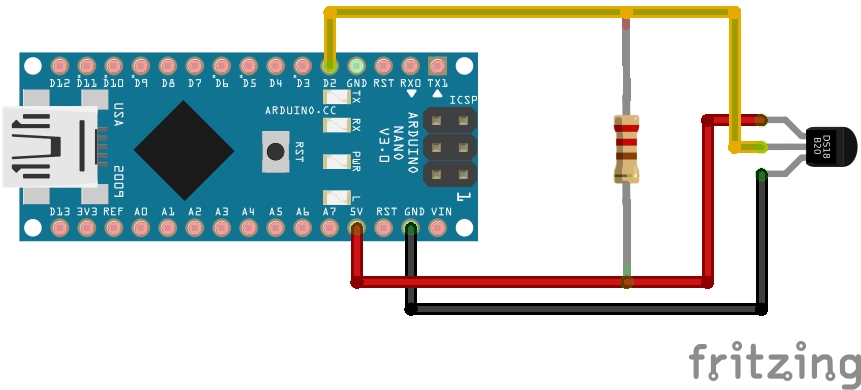
Connect the DS18B20 sensor to Arduino Nano board
| DS18B20 | Arduino Pin |
| Black | GND |
| RED | 5v |
| YELLOW | d2 |
Setup
Arduino can be connected to your PC through the USB port. The mainboard use the serial port to communicate.
Set your Arduino Software environment
Arduino boards are able to read inputs and turn it into an output. All this is defined by a set of instructions programmed through the Arduino Software (IDE) and uploaded to the microcontroller.
- Install the OneWire, DallasTemperature library using the “Library Manager” (Sketch > Include Library.. > Manage Library)
Upload to Arduino the script to read data
- Open your Arduino IDE program and paste this code:
#include <OneWire.h>
#include <DallasTemperature.h>

// Data wire is plugged into pin 2 on the Arduino
#define ONE_WIRE_BUS 2

// Setup a oneWire instance to communicate with any OneWire devices
OneWire oneWire(ONE_WIRE_BUS);

// Pass our oneWire reference to Dallas Temperature.
DallasTemperature sensors(&oneWire);

void setup(void)
{
    Serial.begin(9600);
    sensors.begin();
}

void loop(void)
{
    sensors.requestTemperatures();
    Serial.println(sensors.getTempCByIndex(0));
    delay(1000);
}
Note
Before uploading the program to the board verify the code to avoid error like missing library. Then if no error upload the code to the Arduino board.
Data acquisition
First let’s create a new Arduino sensor in istSOS, add procedure arduino with multiple observed properties:
| Name: | arduinonano |
| Description: | Arduino board used in the tutorial |
| Keywords: | arduino,air,temperature |
| System type: | insitu-fixed-point |
| Sensor type: | DHT11 |
| FOI name: | GENOVA |
| EPSG: | 4326 |
| Coordinates: | x: 44.4029 y: 8.9587 z: 63 |
Add air temperature:
| Observed property: | urn:ogc:def:parameter:x-istsos:1.0:meteo:air:temperature |
| Unit of measure: | °C |
Register the new sensor (procedure) pressing the “submit” button.
Now it’s time to read the data coming from arduino and upload them to istSOS. In the script folder of istsos you can find the serial2istsos.py file.
Note
This script is an example of how to read data from the serial output and send data in real time to istSOS using the WA-REST API.
python script/serial2istsos.py --help

usage: serial2istsos.py [-h] [-v] [-c C] [-x X] [-b B] [-p P] [-u url]
                [-s service] [-user user name] [-password password]

Load data read from a serial port and execute insert data to istSOS

optional arguments:
  -h, --help          show this help message and exit
  -v                  Activate verbose debug
  -c C                Config file instead of inline params
  -x X                Serial port to listen
  -b B                serial port baudrate
  -p P                Procedure name
  -u url              istSOS Server address IP (or domain name) used for all
                      request. (default: http://localhost:80/istsos).
  -s service          The name of the service instance.
  -user user name
  -password password
The configuration file:
{
    "url": "http://istsos.org/istsos",
    "service": "demo",
    "port": "/dev/ttyUSB0",
    "baud": "9600",
    "procedure": "arduinonano",
    "header": 0,
    "aggregationInterval": "PT10S",
    "observations": [{
        "name": "urn:ogc:def:parameter:x-istsos:1.0:meteo:air:temperature",
        "column": 0,
        "aggregation": "avg"
    }]
}
Date time configuration variations are optional, if not given, current timestamp will be used, other configurations
Execute the script, but close the Arduino IDE “Serial Monitor” if still opened.
cd /usr/share/istsos
python scripts/serial2istsos.py -v -c /home/user/Desktop/Tutorial/arduino/arduino-nano.json